Wall Calendar - The IOT web project is successfully in use

Stephan wrote on 21.05.2024 about...
From the idea to the project
The idea came over time when I bought a large paper wall calendar every year. You could digitize it and add a few additional features such as measuring the room climate and displaying weather data. That's how it happened in the end. A first mockup is the idea that was pursued and implemented over the course of the project.
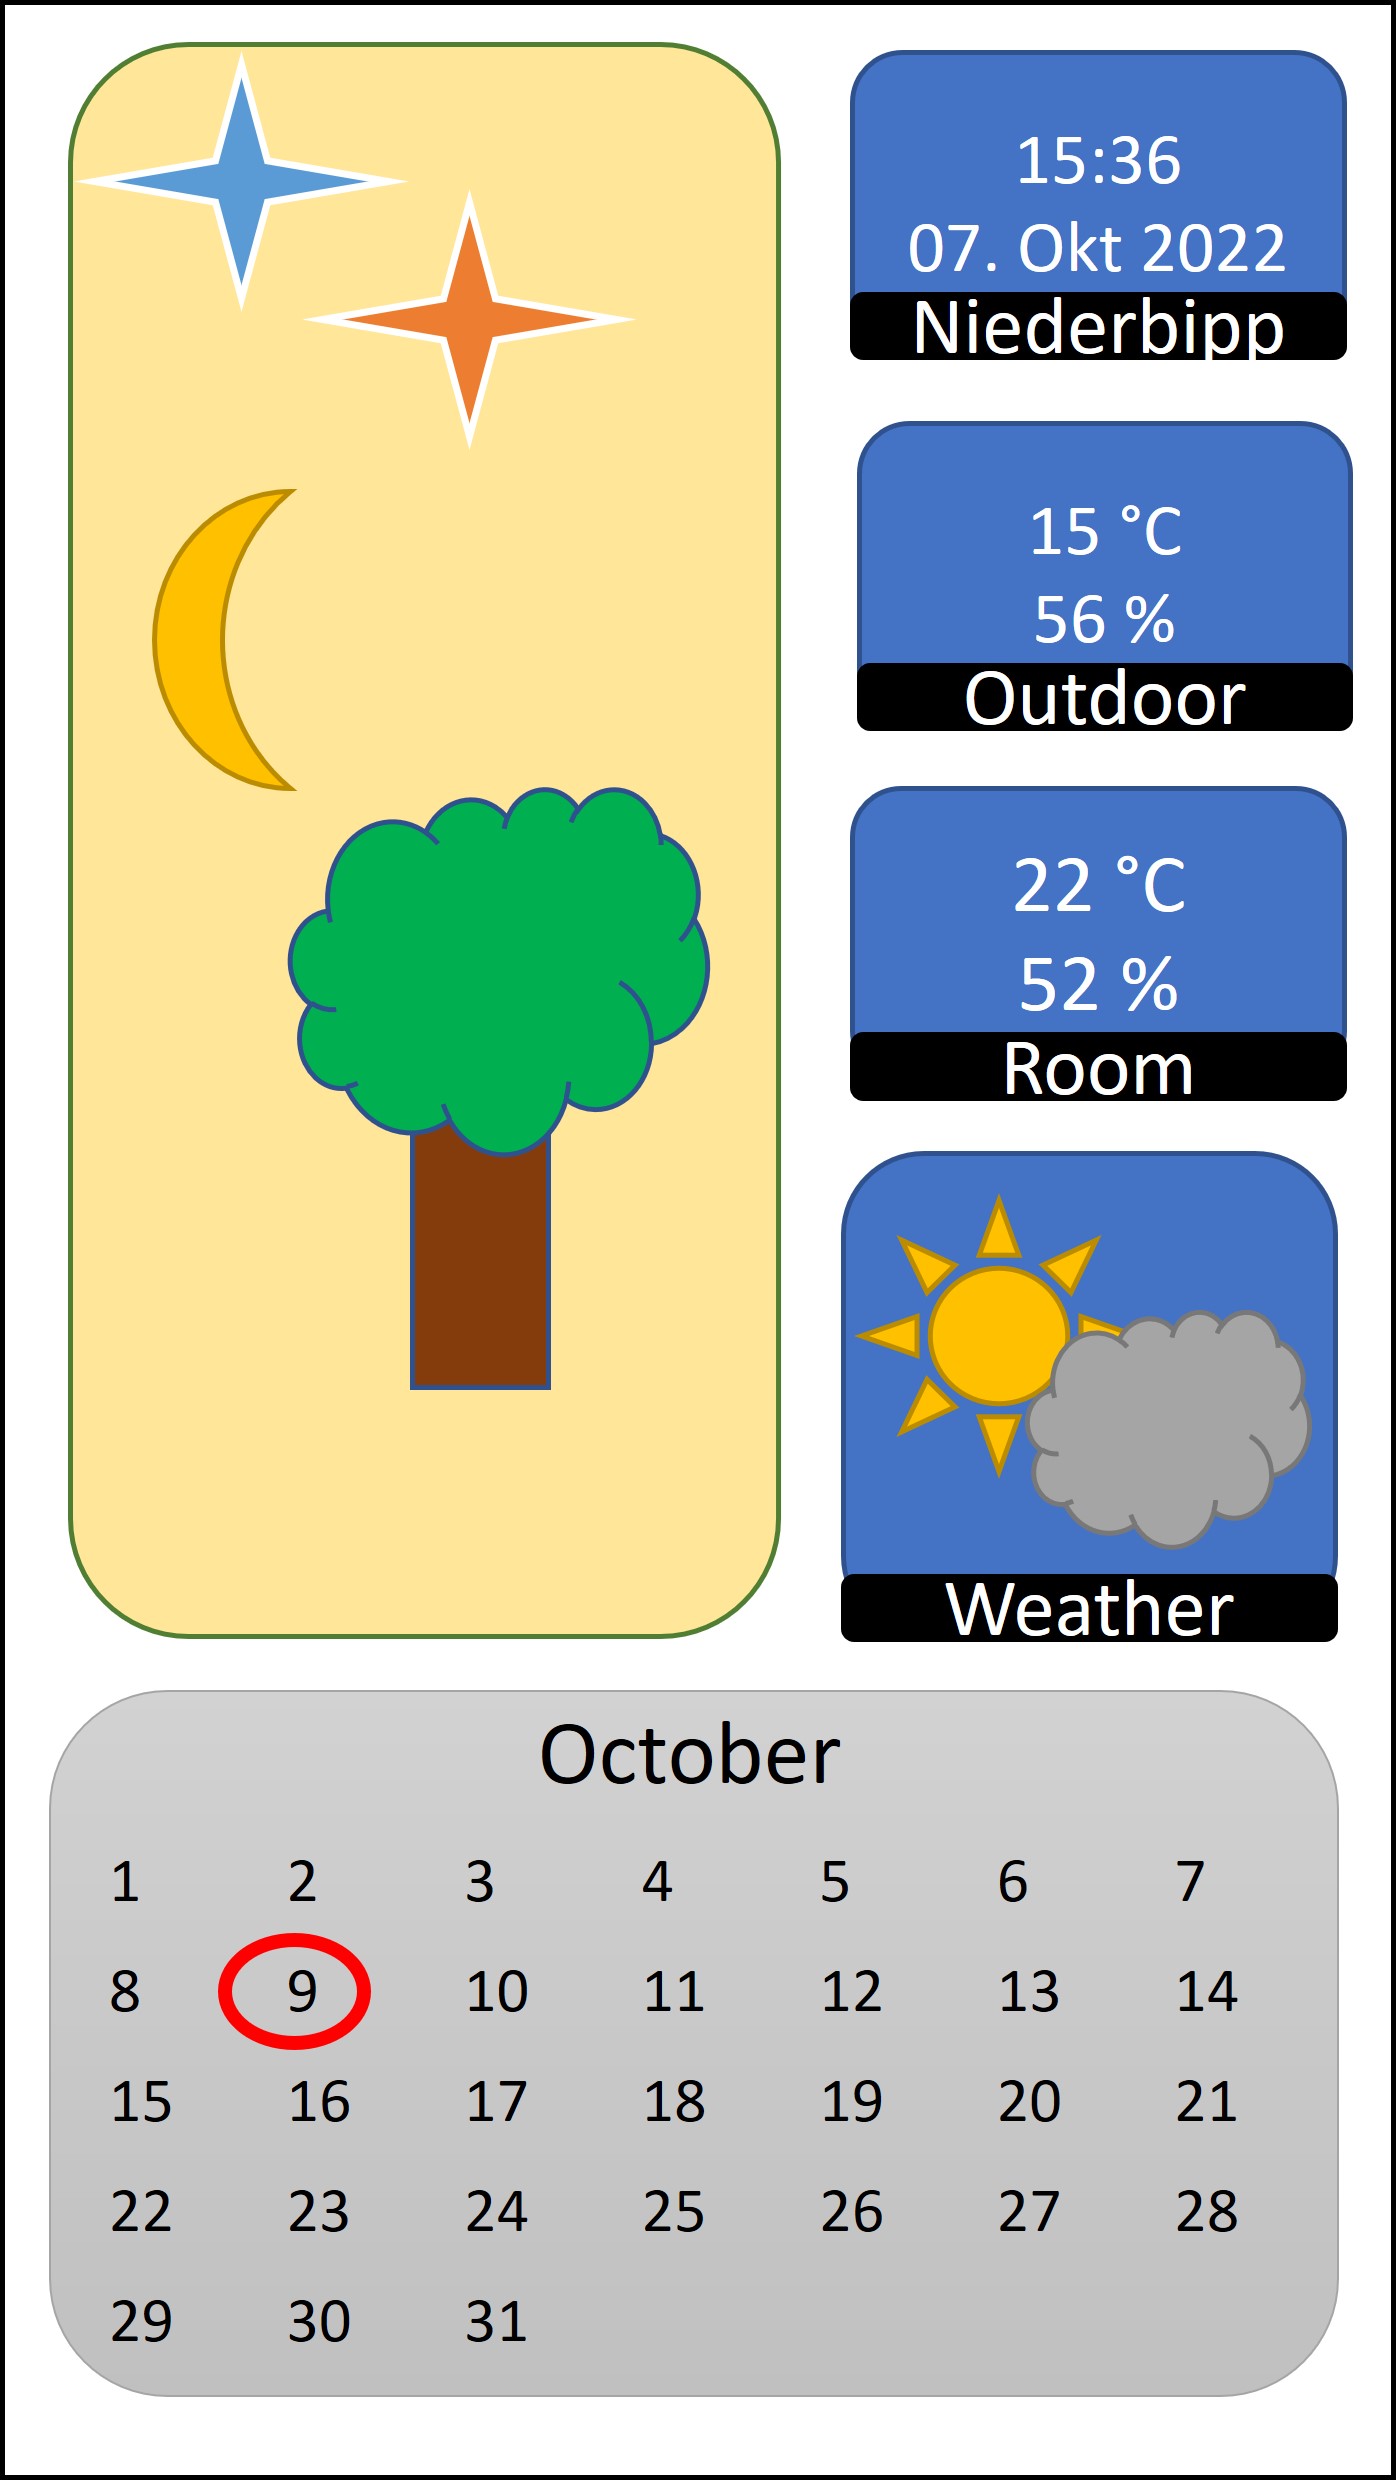
Digital Wall Calendar Mockup. It should contain a calendar, a slideshow of selected photos, room climate measurements and a weather forecast.
Conception and architecture
At the beginning, an API was implemented using the Python Django framework, which uses an HTTP frontend. The services run on a Debian Linux server. Later, the API was split as an interface in the IOT network and a second backend in the network for the users. This simultaneously allows for an independent and specialized division of tasks and the added value of physically separate networks between IOT hardware and website hosting for users. A Celery task scheduler and pool worker also runs in the sensors' API in conjunction with a RabbitMQ broker. Currently, 4 temperature and humidity sensors serve the IOT interface with current measurement data every 20 seconds.
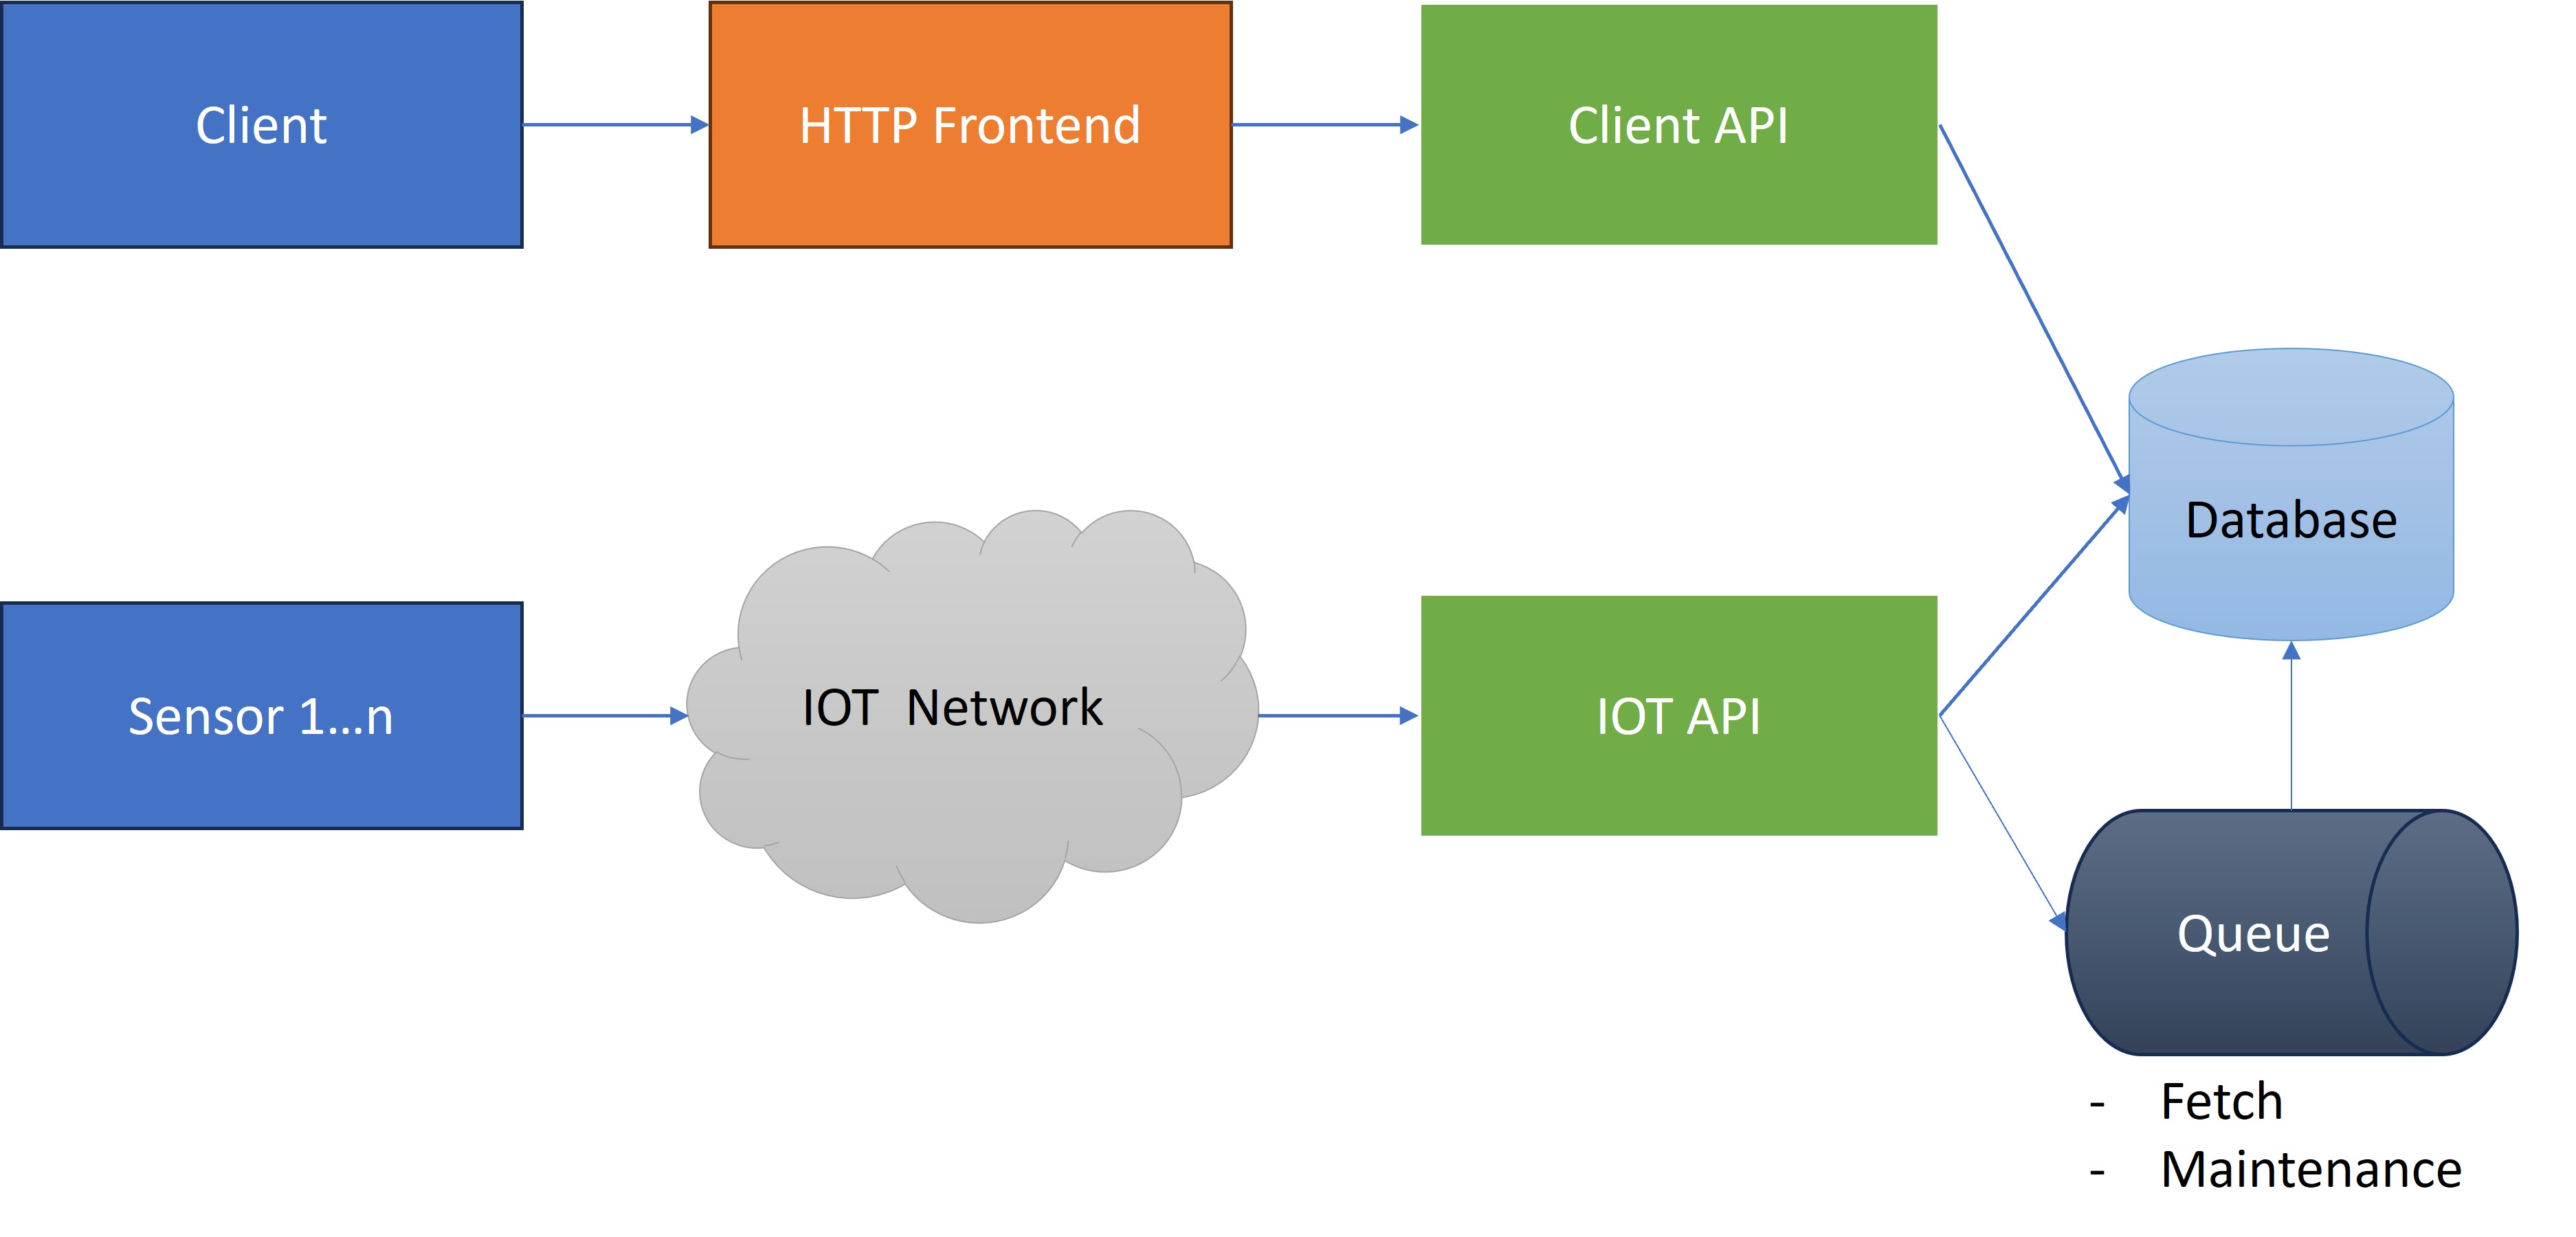
Architecture of the Wall Calendar System.
The hardware thing...
In the beginning, the web services were operated relatively stably experimentally, even with an experimental board such as one from Raspberry Pi. However, over the course of the project, the back and front ends were deployed on a Debian 12 virtual machine, which serves as the host. At the beginning, an Arduino board from my experiment box served as the first sensor. Until recently, however, the Wemos D1 board with an integrated WiFi shield was used, which shows very good stability and performance. The setup in connection with the Arduino Studio was a bit tricky. But once set up, the boards can be easily connected to the programming environment (IDE) and flashed. First, inexpensive DHT temperature and humidity sensors were used. We then switched to more accurate and high-performance sensors from Digilent, which have been used with very good experience.
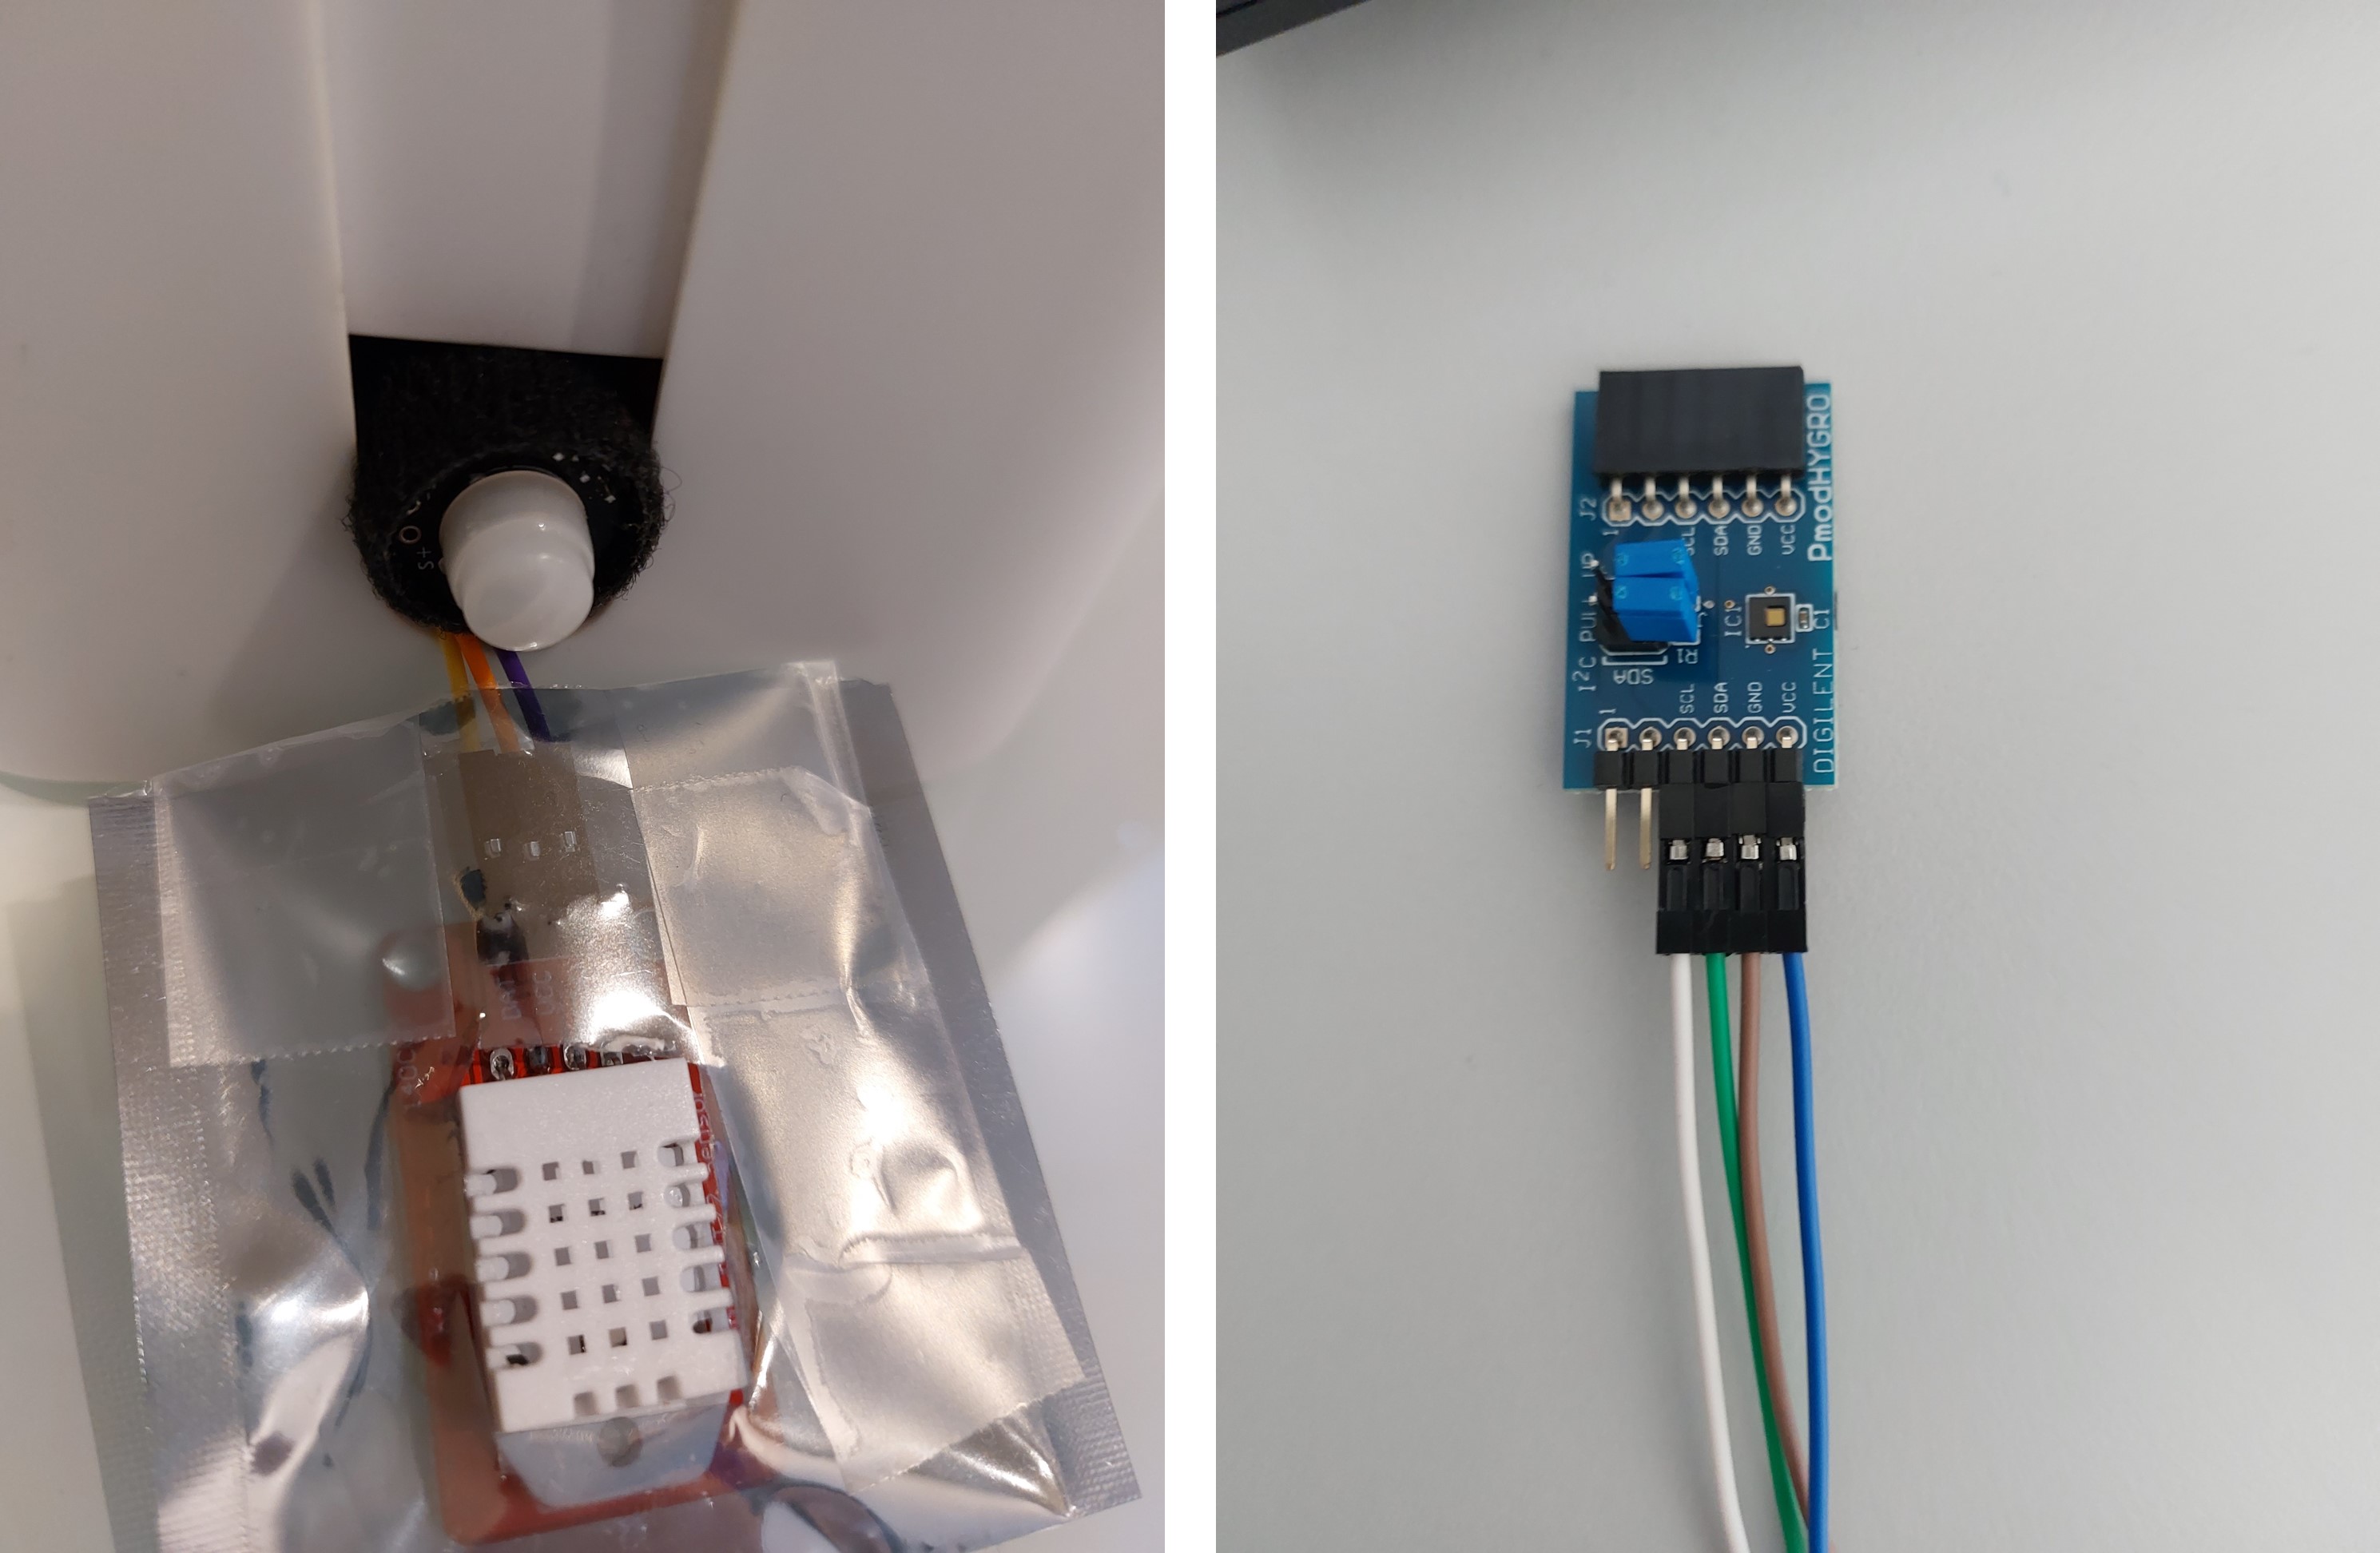
On the left in the picture is the temperature and humidity sensor used as version 1. As shown in the picture on the right, the much more expensive but more powerful and precise sensor from Digilent used today as version 2 is in use.
As a prototype structure, an Arduino board and a DHT sensor were read out via I2C via the Raspberry Pi as an IOT sensor. Later, several Wemos D1 Wifi Shields are successfully used as temperature and humidity monitors, which send the measurement data to the server via WiFi.
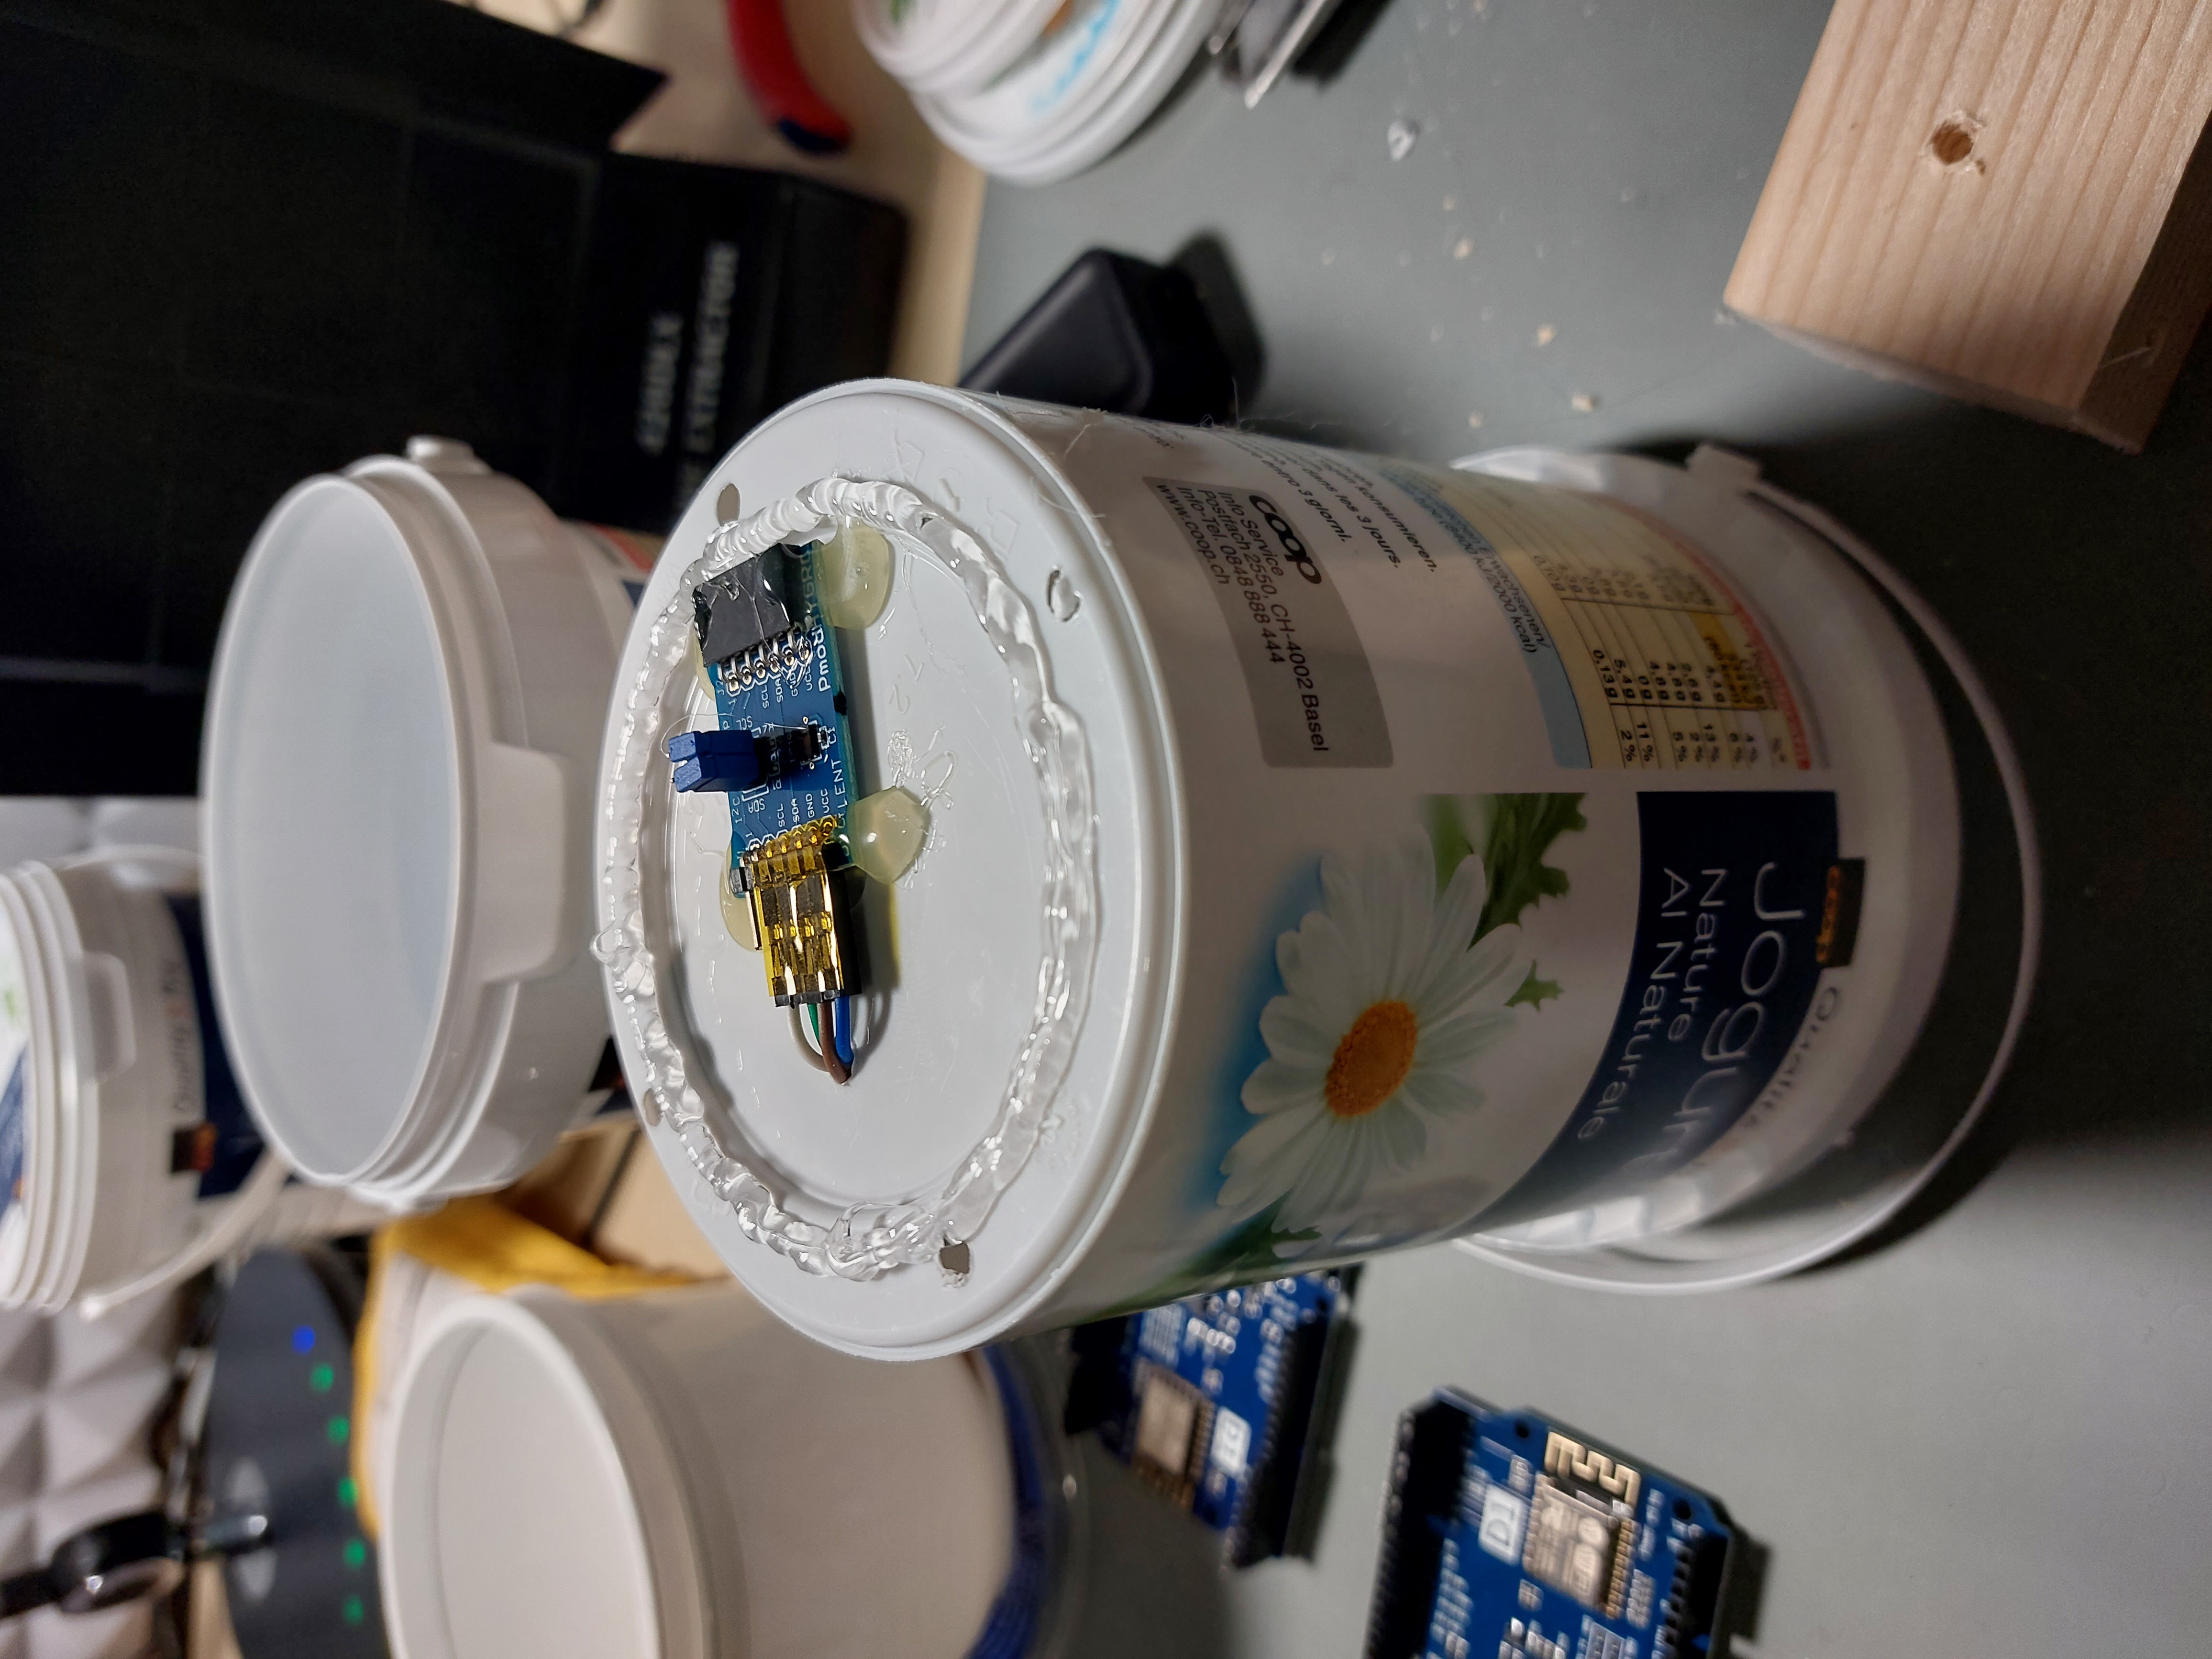
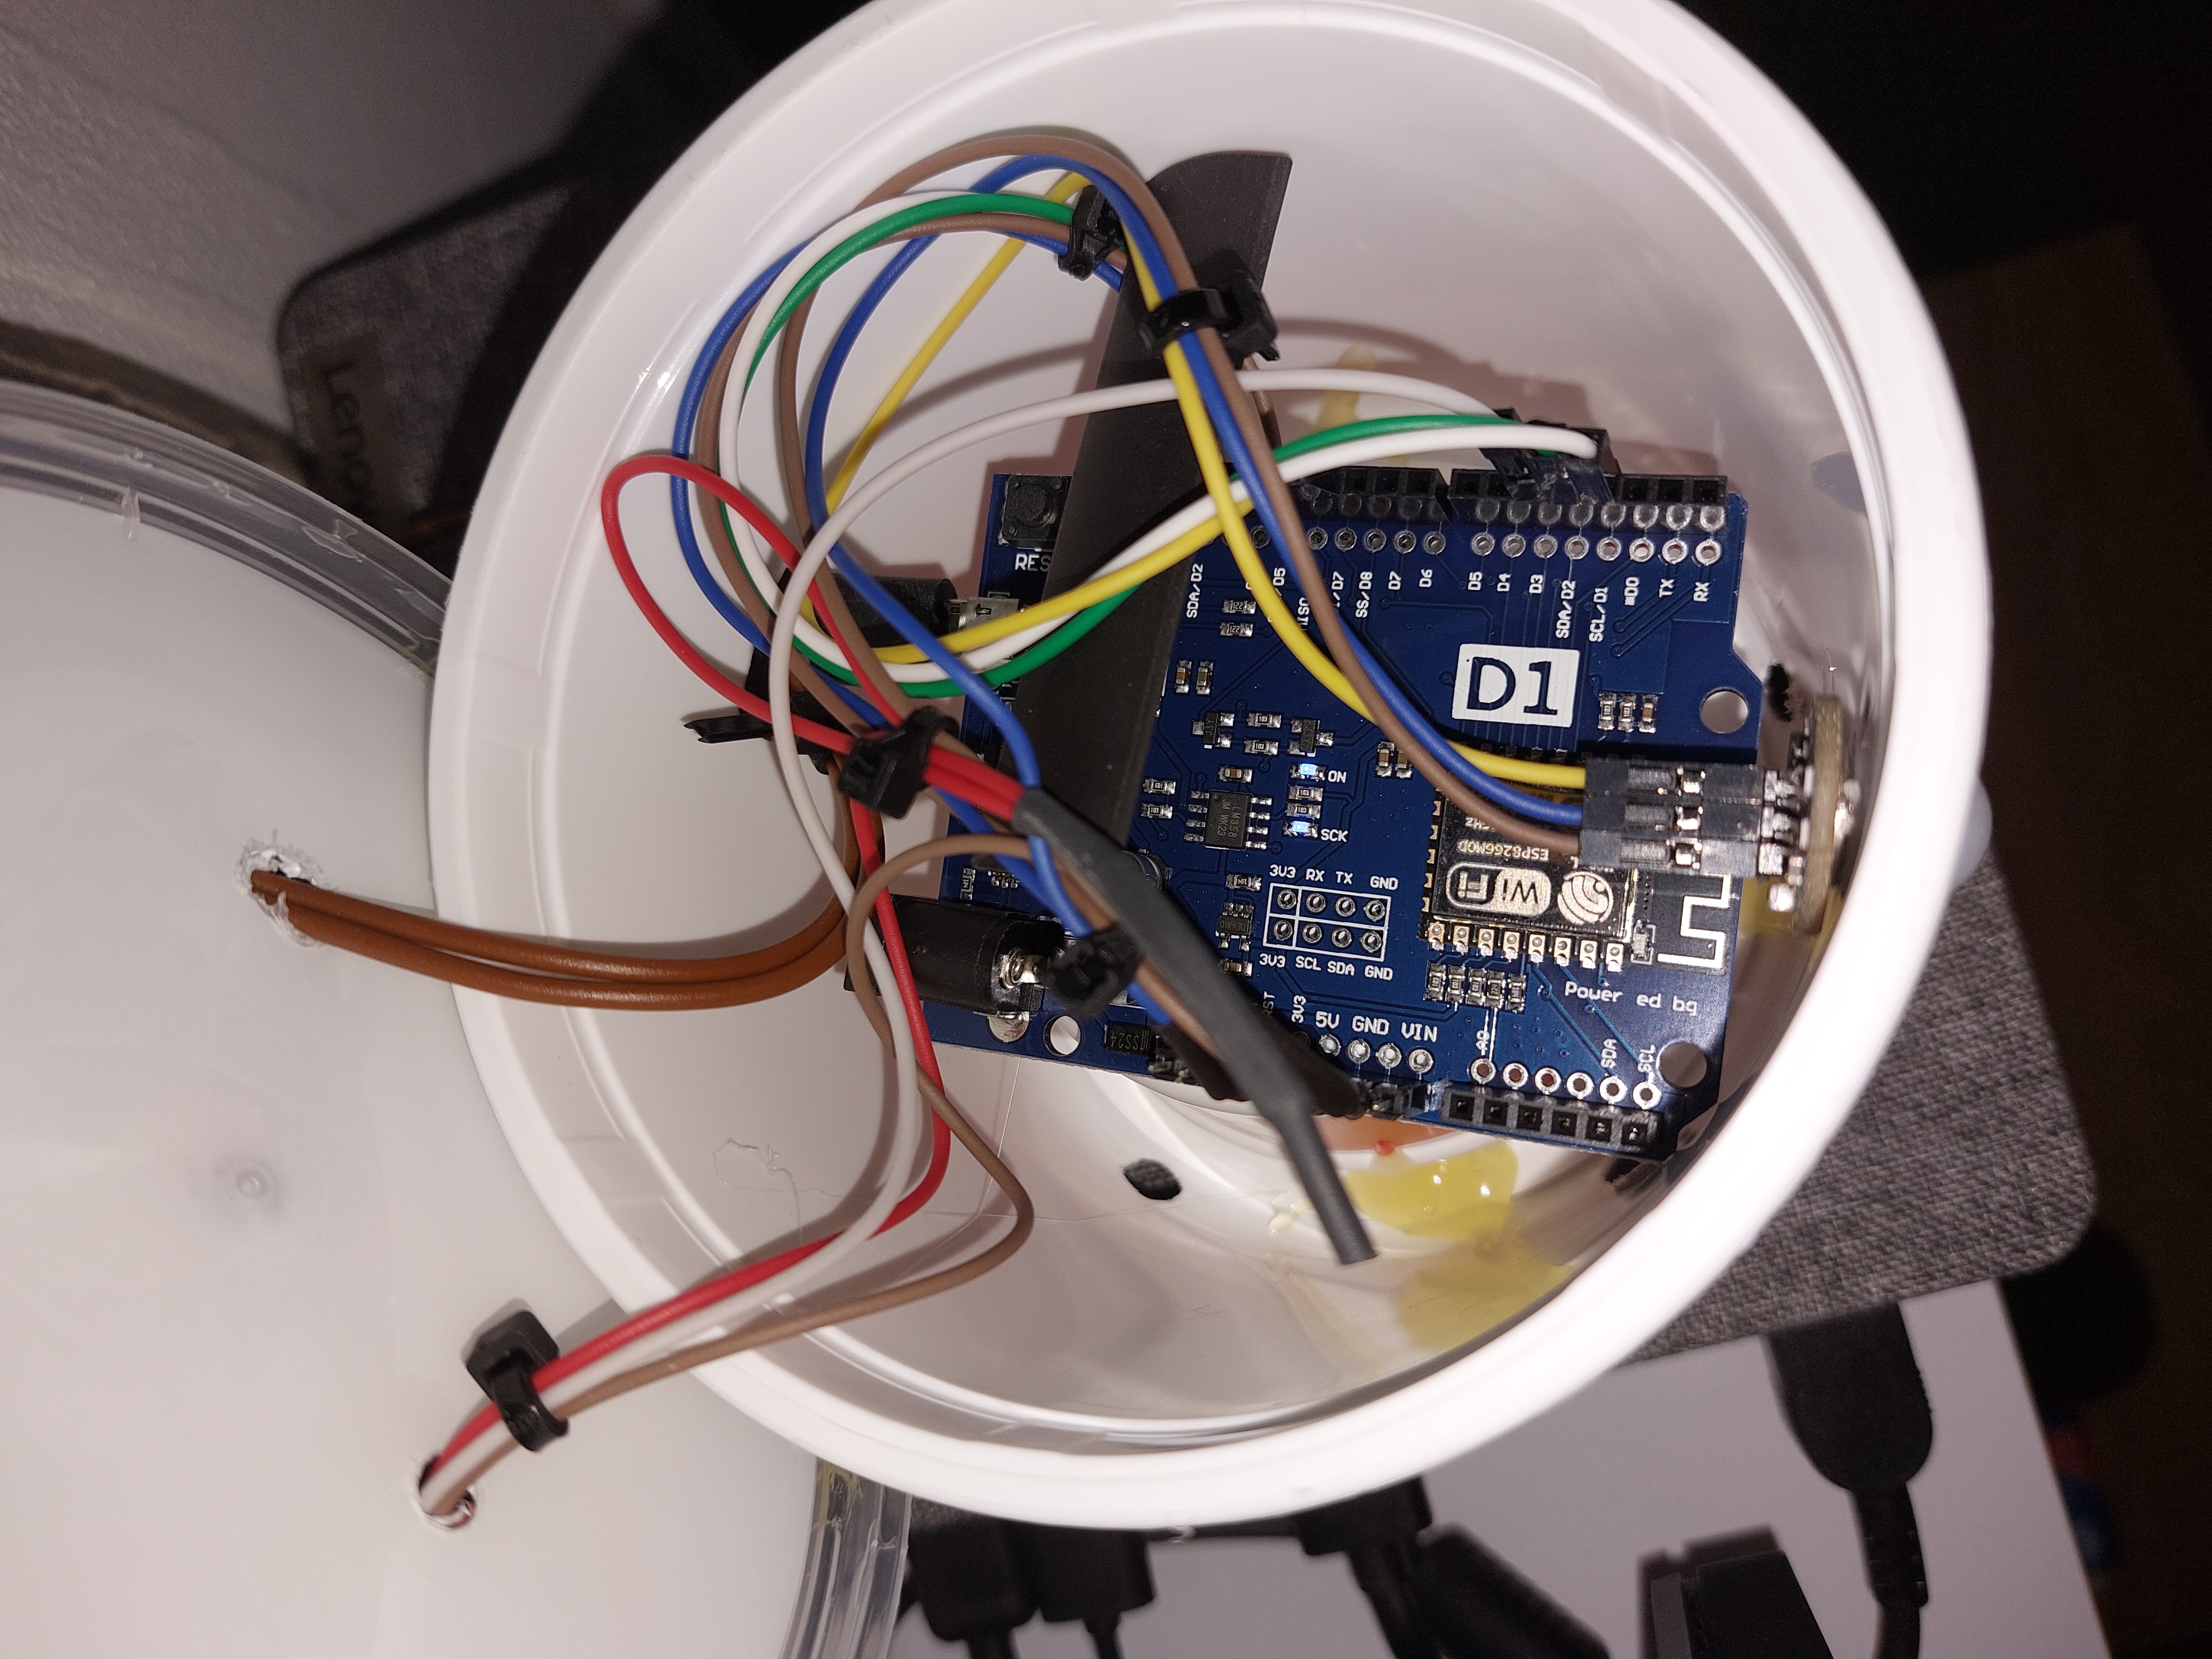
The outdoor sensor and the IOT board were housed as a prototype in a housing that was specifically designed and protected against direct water ingress. The sensor was attached to the underside to protect it from direct exposure to water, and the border was sealed with a special sealant. The IOT board is inserted into the top of the cup and is also sealed and sealed watertight.
The final result
The APIs run stably and the sensors continuously deliver their measured values to the server every 20 seconds. Data older than around 30 minutes is cleaned up in the database, which is operated on PostgreSQL.
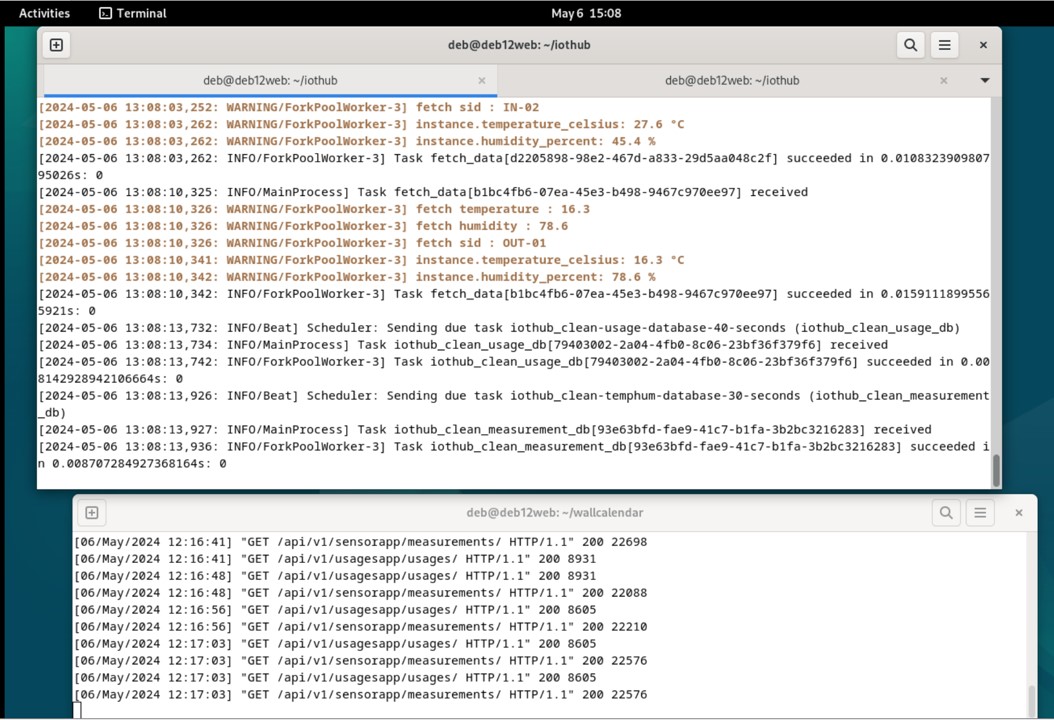
The IOT-side API runs at the top of the terminal, and at the same time the Celery Task Scheduler runs there to process the received sensor data and clean up the database. The backend for operating the frontend in the client network is active in the lower terminal.
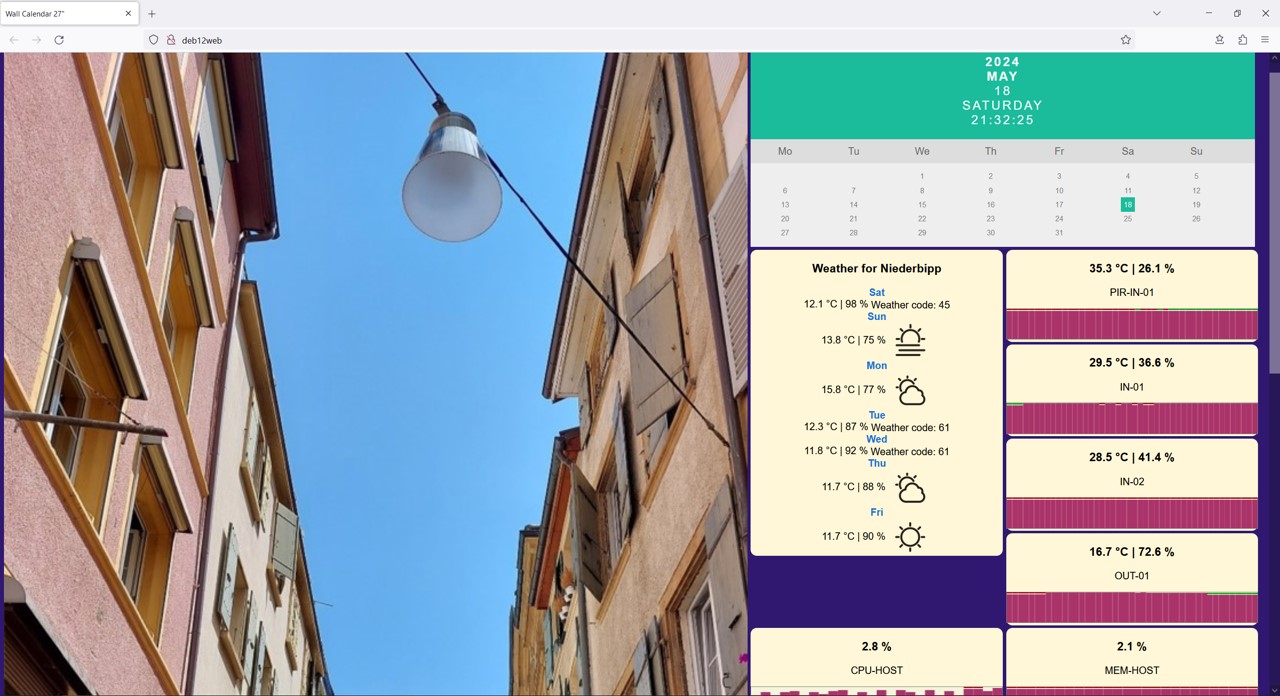
The frontend now displays the slideshow, the calendar with time, the 7-day weather forecast, sensor readings and even the CPU and memory utilization of the host. At the beginning, the front end was displayed on a portrait screen, which was switched on for a certain time using the relay via a PIR sensor when you stood within range. Meanwhile, the front end is simply available as a website in the home network and is displayed both as a normal widescreen website and as a mobile device-optimized website on smartphones and tablets.